
Sensitive Skin Pedicure Preparation: Protect Reactive Feet

If you have sensitive skin, the right preparation for a pedicure comes down to four things: hydrate your feet for several days beforehand, stop using new or fragranced products, patch-test anything unfamiliar, and tell your technician about any health conditions before the service starts. Arrive with clean, dry feet and no lotion on them.
72-hour checklist:
Moisturize feet every evening for at least 3 nights before your appointment
Stop all aggressive exfoliation (pumice scraping, razors, at-home shavers) 3 days out
Remove any existing nail polish with an acetone-free remover the night before
Shave legs the night before, not the morning of, to let micro-nicks settle
Patch-test any new product on a small skin area 24–48 hours before using it on your feet
Bring your own hypoallergenic polish or remover if you have known sensitivities
Pro Tip: If you’re trying a new lotion or foot cream before your appointment, apply a small amount to the inside of your wrist or behind your knee 48 hours ahead. If there’s no redness or itching, it’s likely safe for your feet.
Key Takeaways
Proper sensitive skin pedicure preparation comes down to consistent hydration, avoiding irritants for at least 72 hours, patch-testing new products, and disclosing health conditions to your technician before the service begins.
Point | Details |
Hydrate 3 days before | Apply fragrance-free moisturizer nightly with cotton socks to strengthen the skin barrier. |
Soak for ~10 minutes | Use warm (not hot) water with fragrance-free soap; avoid salts and essential oils. |
Space pedicures ~8 weeks apart | Allows skin and nails to recover fully between services, per AOFAS guidance. |
Disclose health conditions | Tell your technician about diabetes, eczema, open wounds, or allergies before the service starts. |
Bradentonnails accommodates sensitive skin | TJ Nails uses single-use tools, fresh liners, and fragrance-free options on request in Bradenton. |
Table of Contents
How to prepare sensitive skin for a pedicure: the week before
The 3–7 days before your appointment are when the real prep happens. Skin that’s well-hydrated going into a pedicure responds better to soaking, filing, and product application. Dry, barrier-compromised skin does the opposite: it absorbs chemicals faster, reacts to friction more intensely, and takes longer to recover.
Apply a fragrance-free, glycerin-based moisturizer to your feet every evening. Put on a pair of cotton socks right after to lock in moisture while you sleep. This simple habit noticeably softens calluses and strengthens the skin barrier within a few nights. According to preparation guidance from Organic Nails and Spa, moisturizing consistently for 2–3 days before a pedicure improves treatment outcomes and reduces the chance of irritation during the service.
Avoid introducing any new skincare products to your feet during this window. Fragranced lotions, new foot scrubs, or unfamiliar creams all carry the risk of a delayed reaction that could show up mid-appointment. Stick to what your skin already knows.
Stop all aggressive home treatments at least 3 days before your pedicure. Pumice scraping, electric callus removers, and razor-style shavers all thin the skin’s surface layer. Walking into a salon with already-abraded skin means the soak, the filing, and even the lotion application can trigger redness or stinging that wouldn’t otherwise happen.
If your feet are currently showing an active rash, broken skin, or a flare-up of eczema or psoriasis, postpone the appointment. There’s no timeline that overrides healing. Wait until the skin is fully closed and calm before booking.
Pro Tip: A podiatrist-approved home pedicure workflow, as outlined by Berg DPM, emphasizes softening the skin first before any trimming or exfoliation. That same principle applies to your pre-appointment prep: hydration is the foundation, not an optional add-on.
What to do the day before and the day of your appointment
The day before and the morning of your pedicure are about simplicity. Less is more.
The night before:
Shave your legs if needed. Shaving the morning of leaves tiny nicks that sting when exposed to soak water and salon products.
Remove any existing nail polish using an acetone-free remover. Acetone can dry out the nail bed and surrounding skin, which is the last thing you want going into a service.
Apply your usual fragrance-free moisturizer to your feet and put on cotton socks overnight.
Skip heavy exfoliation entirely. Your technician will handle that part.
The morning of:
Wash your feet with a gentle, fragrance-free soap and dry them thoroughly, including between the toes.
Do not apply lotion right before you leave. Lotion on the nail plate interferes with polish adhesion, and residue on the skin can dilute the soak or react with salon products.
Wear open-toed shoes or sandals to the salon. Closed shoes after a fresh pedicure are uncomfortable and can smudge polish.
Bring a short written list of your allergies, skin conditions, and any medications you’re currently taking. Technicians appreciate having this information upfront rather than piecing it together mid-service.
If you prefer to use your own products, pack them in a small bag: your hypoallergenic polish, acetone-free remover, and a gentle nail file. Most reputable salons will accommodate this without hesitation.
How long should you soak sensitive feet, and what should you use?
Soaking is where a lot of sensitive-skin pedicures go wrong. Too hot, too long, or the wrong additive, and you’ve already set off a reaction before the filing even starts.
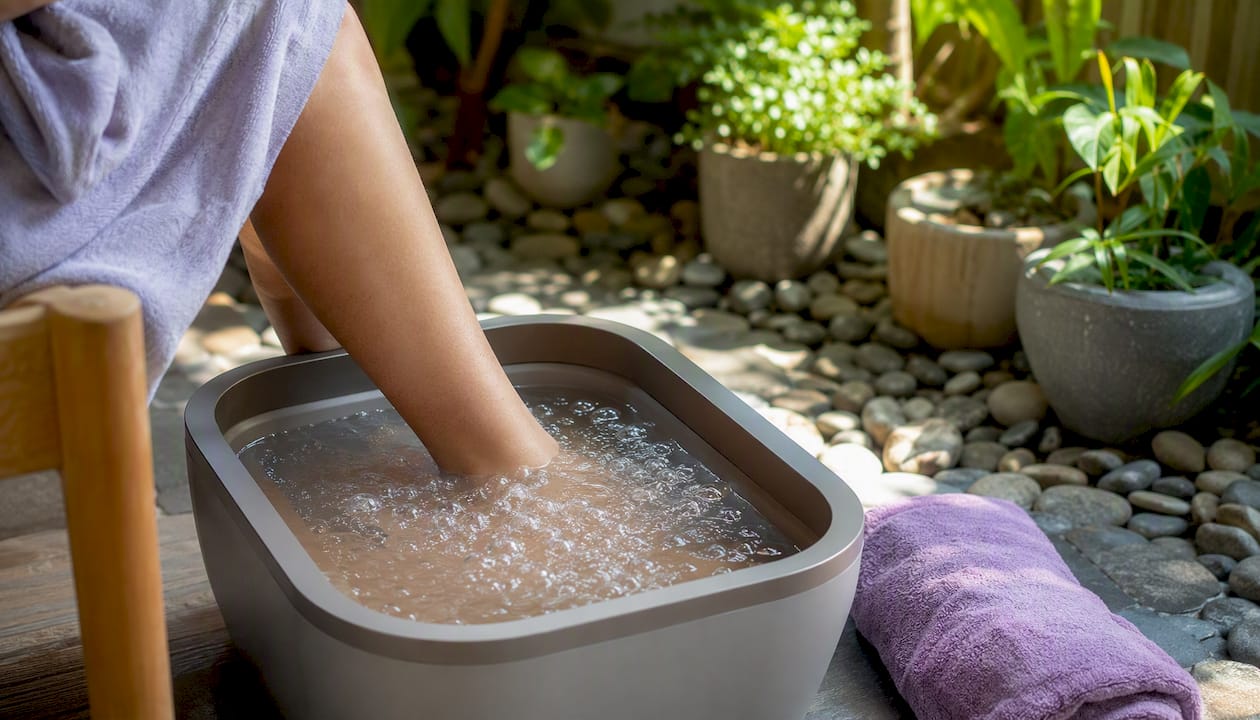
The American Orthopaedic Foot & Ankle Society recommends soaking feet in warm soapy water for approximately 10 minutes. That’s the sweet spot: long enough to soften the skin and nails, short enough to avoid over-maceration, which breaks down the skin barrier and makes it more permeable to irritants.
Water temperature matters more than most people realize. Hot water dilates blood vessels and increases skin permeability, which means your feet will absorb whatever is in that soak water more readily. Warm, not hot, is the right call for reactive skin.
For soak additives, fragrance-free liquid soap is the safest option. Skip bath salts, essential oils, and alkaline foot soaks if your skin is reactive. These can disrupt the skin’s natural pH and trigger contact dermatitis in sensitive individuals.
Parameter | Recommended guideline | Notes |
Soak duration | ~10 minutes | Per AOFAS podiatry guidance |
Water temperature | Warm, not hot | Hot water increases skin permeability |
Soak additive | Fragrance-free soap | Avoid salts, oils, or alkaline solutions |
Spacing between pedicures | ~8 weeks | Allows skin and nails to recover fully |
Exfoliation tool | Pumice stone or Hindu stone | Avoid razors, electric shavers, coarse graters |
For exfoliation, a soft pumice stone or Hindu stone used with light, circular pressure is the appropriate tool. Coarse graters, electric callus removers, and razor-style shavers are too aggressive for sensitive skin and can remove more than just dead skin. If a callus is thick, two or three gentle passes over multiple appointments is safer than one aggressive session.
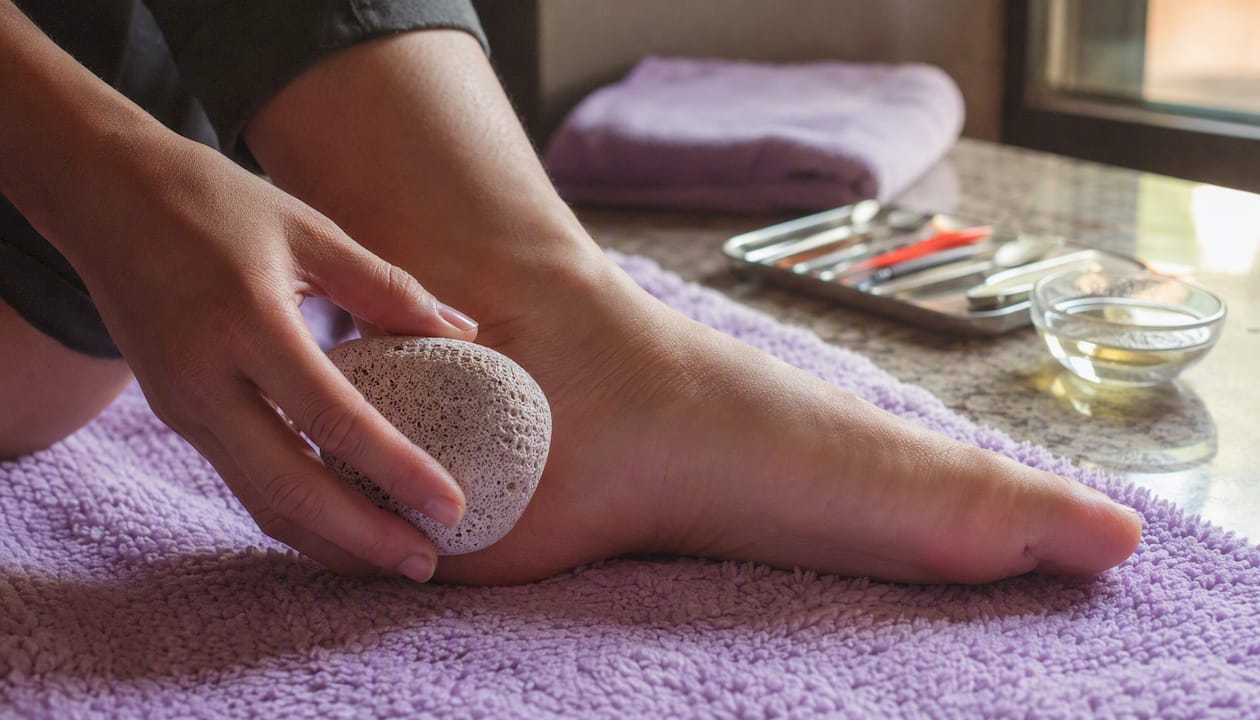
Pro Tip: If your skin tends to react to metal tools, ask your technician to use a soft pumice or a fine-grit buffer instead of a metal foot file. The result takes slightly longer but causes significantly less friction trauma.
Safe toenail trimming and cuticle care for sensitive skin
Nail trimming and cuticle work are the two steps most likely to cause microtears, ingrown nails, or post-service inflammation when done incorrectly.
Trim toenails straight across, leaving a small sliver of white nail visible at the tip. Rounding the corners or cutting too short are the main causes of ingrown nails, which are especially problematic for people with sensitive or reactive skin.
Use sharp, clean nail scissors or clippers. Dull tools require more pressure and are more likely to crush the nail rather than cut it cleanly.
Refine the edge with a fine-grit emery board using light, one-directional strokes. Back-and-forth sawing creates heat and micro-friction that can irritate the nail bed.
Push cuticles back gently using a rubber-tipped cuticle pusher after soaking, when the skin is soft. Aggressive pushing on dry cuticles tears the tissue.
Cuticle trimming is where the most damage happens. The cuticle is a protective seal between the nail plate and the skin. Cutting it aggressively removes that barrier and opens a pathway for bacteria and irritants. Light trimming of loose, overgrown cuticle tissue is acceptable; cutting live cuticle tissue is not.
If cuticle trimming draws blood at any point, stop immediately. Tell your technician. A small nick is not a minor inconvenience for sensitive skin — it’s an open wound in a warm, product-rich environment, which is exactly the condition that leads to infection or a contact reaction.
A podiatrist-approved pedicure workflow from Berg DPM places careful cuticle management as a distinct step, not an afterthought, precisely because it’s where most at-home and salon pedicures cause unnecessary damage.
Which products are safest for sensitive skin pedicures?
The ingredient list on a salon product matters more for sensitive skin than the brand name on the bottle.
Ingredients to avoid:
Fragrances and parfum: The most common contact allergen in personal care products. “Unscented” is not the same as fragrance-free; some unscented products contain masking fragrances.
Acetone: Strips natural oils from the nail and surrounding skin. Acetone-free removers are widely available and gentler for reactive skin.
Toluene, formaldehyde, and formaldehyde-releasing resins: Found in some nail polishes and hardeners. “3-free” and “5-free” polish labels indicate these specific chemicals have been removed, but as Vital Balance Life notes, those designations reduce certain chemicals without eliminating all possible irritants for highly reactive skin.
Camphor: A common polish ingredient that can cause skin sensitization in some people.
“3-free” and “5-free” polish labels are a useful starting point, not a guarantee. They remove specific known toxins, but sensitive skin can still react to dyes, resins, or other components in the formula. Patch-testing a new polish on a small area of skin 24–48 hours before your appointment is the only reliable way to know how your skin will respond.
Safer alternatives to look for or bring:
Glycerin-based or colloidal oatmeal foot creams (fragrance-free)
Aloe vera-containing lotions for post-service soothing
Acetone-free nail polish removers, which are available at most drugstores and beauty retailers
Hypoallergenic or “5-free” polishes, patch-tested in advance
If you have a polish you already know works for your skin, bring it. Most salons will use client-supplied products without issue.
Pro Tip: Patch-testing new polishes or lotions 24–48 hours before full use is a simple precaution that many sensitive-skin clients skip. Apply a small amount to the inside of your elbow, leave it for 24 hours, and check for redness, itching, or swelling before committing to a full application.
What health information should you tell your technician?
Disclosing your health history before a pedicure isn’t just courtesy. It’s how you prevent a minor service from becoming a medical problem.
Tell your technician before the service starts if you have any of the following:
Diabetes or poor circulation: Reduced sensation in the feet means you may not feel pain from cuts or excessive heat. People with diabetes should take extra precautions or consult their physician before cosmetic pedicures, as Werkman, Boven & Associates advises.
Eczema or psoriasis on the feet: Active flares should delay the appointment entirely. Stable patches should be pointed out so the technician avoids them.
Recent steroid or immunosuppressant treatment: These medications affect skin healing and infection resistance.
Known allergies to nail products, latex, or specific ingredients
Open wounds, cuts, or active fungal infections (athlete’s foot)
Recent skin reactions to salon products
When to delay entirely: active athlete’s foot, open blisters, fresh cuts, new rashes, or any undiagnosed skin change on the foot. A pedicure on broken or infected skin can spread the infection and introduce bacteria into an open wound.
Salon hygiene is your second line of defense. Before sitting down, confirm that the footbath has a fresh liner, that tools are sterilized or single-use, and that the technician washes their hands before starting. A reputable salon will not hesitate to show you their sterilization setup. If they do hesitate, that’s your answer.
Common mistakes to avoid before a sensitive-skin pedicure
Some of the most common pre-pedicure habits are exactly the ones that cause problems for reactive skin.
The 72 hours before your appointment are not the time to try anything new on your feet. New products, aggressive tools, and last-minute treatments all introduce variables that can make the salon service harder on your skin, not easier.
Specific things to avoid:
Over-exfoliating within 72 hours: Heavy pumice work, electric callus removers, or at-home razor tools thin the skin’s surface layer. The salon will handle exfoliation; arriving with already-abraded skin doubles the trauma.
Applying new fragranced lotions or strong removers right before the appointment: These can trigger a reaction that gets attributed to the salon product when the real cause was applied an hour earlier.
Scheduling other skin treatments within 24–48 hours: Waxing, chemical peels, or laser treatments near the feet or lower legs leave skin sensitized. Combining them with a pedicure in the same window multiplies irritation risk.
Hiding medical conditions from your technician: A technician who doesn’t know about your diabetes, circulation issues, or active skin condition cannot adjust their technique. Being upfront is the single most effective safety measure available to you.
What a sensitive-skin pedicure looks like at a reputable salon
Knowing what a properly adapted pedicure should look like gives you the language to request it and the confidence to recognize when a salon is cutting corners.
A sensitive-skin pedicure at a well-run salon follows this sequence:
Health intake: The technician asks about allergies, medications, skin conditions, and recent reactions before touching your feet.
Fresh footbath liner: A new liner is placed in the basin for each client. The water is warm, not hot, with fragrance-free soap only.
Single-use or sterilized tools: Files, buffers, and orangewood sticks are either single-use or visibly sterilized. Metal tools come from an autoclave or sealed sterilization pouch.
Gentle soak: 10 minutes, warm water, no salts or essential oils unless you’ve specifically requested and tolerated them before.
Light callus smoothing: A soft pumice stone or fine-grit buffer, not a metal grater or electric tool.
Minimal cuticle work: Gentle pushing with a rubber-tipped tool; trimming only loose, overgrown tissue.
Straight-across nail trim: Followed by light emery board refinement.
Hypoallergenic lotion or client-supplied product: Applied after the service, not before polish.
Polish application using client-supplied or 5-free product: If polish is part of the service.
What you should see in the salon: posted cleaning protocols, staff who wash hands between clients, and a willingness to answer questions about their sterilization process. Salon hygiene checks like these are strong indicators that a sensitive-skin accommodation will actually be followed through.
Bring your own polish, remover, and a quality nail file if you want full control over what touches your skin. A gentle, fine-grit file from a reputable brand gives you more controlled filing than a coarse shared salon instrument.
If you have a physician’s note about a specific condition, bring it. It removes ambiguity and helps the technician make informed decisions quickly.
Pro Tip: When booking, say exactly this: “I have sensitive skin and react to fragrances. Can you use fragrance-free products and single-use files for my appointment?” A salon that takes this seriously will confirm it before you arrive. One that brushes it off is telling you something important.
Sensitive skin doesn’t mean skipping pedicures
The conventional wisdom around sensitive skin and salon services tends toward avoidance. Skip the pedicure, do it at home, use only your own products. That advice is overcautious to the point of being unhelpful.
The real issue isn’t the pedicure. It’s the preparation and the communication. Sensitive skin needs a slightly different approach, not a different destination. The steps in this guide, taken together, reduce the variables that cause reactions: over-abraded skin, unfamiliar products, undisclosed health conditions, and poor salon hygiene. Remove those variables, and a professional pedicure is not only safe for sensitive skin but genuinely beneficial.
The partnership with your technician is what makes the difference. A good technician who knows your skin’s history will adjust pressure, skip aggressive steps, and flag anything that looks off. That relationship builds over time, and it’s worth investing in. Showing up prepared, communicating clearly, and choosing a salon that takes hygiene seriously are the three actions that matter most. Everything else is secondary.
TJ Nails in Bradenton is ready for sensitive-skin clients
Sensitive skin needs a salon that actually listens, and that’s exactly what TJ Nails delivers. The team at Bradentonnails uses single-use implements, fresh footbath liners for every client, and fragrance-free product options on request. Technicians are trained to ask about allergies and skin conditions before starting, so your service is adjusted before any product touches your feet, not after a reaction has already started.

You’re welcome to bring your own polish, remover, or nail file. Flexible hours, including Sundays, mean you can book at a time that works for your schedule rather than rushing in unprepared. When you book, mention your sensitive skin and any specific accommodations you need. The team will confirm the details before your appointment so there are no surprises.
Book your sensitive-skin pedicure at TJ Nails in Bradenton and arrive knowing your skin is in good hands.
Sources
The recommendations in this guide draw from podiatry organizations, salon safety resources, and sensitive-skin product guidance. The sources below are worth bookmarking for ongoing reference.
If you experience redness, swelling, itching, or any sign of infection in the 24–48 hours after a pedicure, stop using any new products applied during the service and contact a healthcare provider. Early treatment of contact dermatitis or a minor infection prevents it from becoming a larger problem.
Recommended
Comments